Showing posts with label tips. Show all posts

Thursday, March 10, 2011

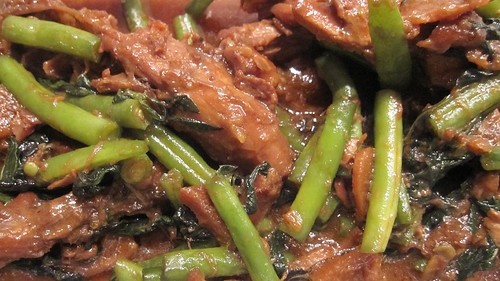
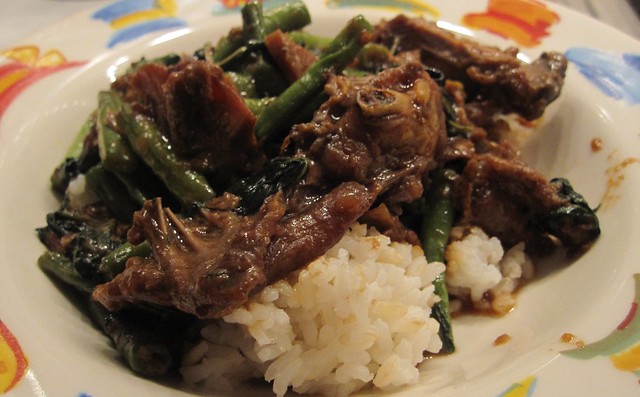
Three Cup Chicken with Thai Basil & Green Beans


Over the last 12 years I spent a significant amount of my time working and living between New York City and Asia, including China, Hong Kong and Taiwan. I was fortunate enough to be able to take the time once in a while and get into a kitchen with Fu, the woman who most often cooked lunches and sometimes dinners for me, allowing me to work more hours without interruption. Some times I would teach her recipes (I taught her to bake her first cookies!) and other times she taught me about Chinese cooking. I miss the travel terribly. I miss Fu too. The baking soda trick below is something she taught me. The sauce has been developed by trial and error reading many recipes and tasting many versions in Taiwan and China (an amazing one in a Taiwanese restaurant in Shanghai I still dream about!) I added the green beans after reading the San Bei Gi recipe in the book the art of EATING IN by Cathy Erway. Thanks for that tasty suggestion Cathy!

This recipe was part of my Cleaning out the Coffers March, save for the Thai Basil which I bought fresh, but used the entire bunch in this recipe - so I allowed it for the rule bending.

Printable version of Recipe

Serves 4-6 servings depending upon their appetites

Ingredients:
2.5 lbs chicken thighs, skinned, fat removed, bone-in preferred (best flavor)
2.5 tablespoons baking soda
1.5 tablespoons cornstarch
5 tablespoons and 1 teaspoon soy sauce
1/3 cup dark sesame oil (has a better flavor than regular sesame oil)
4 dried birds eye chilies, chopped and crushed (optional)
25 cloves of garlic, cut into quarters
25 slices of peeled fresh ginger
5 tablespoons and 1 teaspoon kecap manis (sweet soy sauce)* <-- this gives the authentic flavor I taste when eaten in Asia
1/3 cup Shaoxing cooking wine*
1 pound green beans, ends removed, cut into 3 inch pieces
4 scallions
1 entire large bunch of Thai basil leaves**

Steamed white rice

Substitutions:
* I have had this recipe made with squid as well. Delicious!
* Once I had this dish with eggplant (no green beans). It was also wonderful, but I've yet to try it.

Begin by cutting the large portions of chicken off of the bone, leaving some on the bones. This will allow it to cook faster later and will be easier to tenderize. Rinse and dry the chicken. Put chicken and baking soda in a bowl making sure the chicken is well coated. Let sit 15-20 minutes then thoroughly rinse. This is to help tenderize the chicken.

Combine the cornstarch and soy sauce in a bowl, and pour over the tenderized chicken. Marinade in the refrigerator for a minimum of 45 minutes (or longer.)

As the chicken marinades, you can prepare the vegetables.

In a dutch oven (some prefer non-stick pans, but I adore my All-Clad dutch oven), heat the sesame oil over medium heat. When hot (not smoking), add the chilies, ginger and garlic. Cook until the garlic and ginger grow fragrant.
DO NOT put your nose directly over the pan and breath in if you have used the chilies as the steam may well sting your eyes and nose.

Add the chicken and brown it on all sides. Add the kecap manis and cooking wine and bring to a boil. Once boiling reduce the heat to medium-low and cover cooking until the chicken is done, approximately 10 minutes. Stir occasionally, loosening up the browned bits.

Add the green beans and basil, stirring well, and cook an additional 5-7 minutes (until the green beans are cooked al dente.

Serve with steamed white rice. Sprinkle scallions on each plate prior to serving.

* Available in your local Asian market or online at your favorite Asian market retailer.

TIPS:
**Thai basil is NOT the usual basil found in most supermarkets that you use in a typical pesto. It is more peppery and is extremely fragrant. It is worth finding this special basil, available in Asian supermarkets if not in your specialty market, for the authentic flavor.

Printable version of Recipe

Friday, March 4, 2011

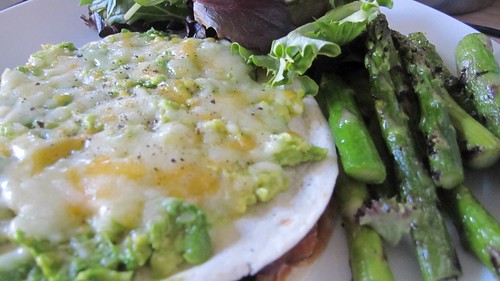
Beany Egg Tortilla (my version of Huevos Rancheros)


I have a bag of avocados, a little bit of salsa and a can of organic spicy black beans that was time to use up and had all of the fixings for an easy and tasty tortilla lunch. It's also great for breakfast brunch or dinner!

This recipe is per serving. Easy enough to double or triple. You can, of course, make two or three eggs rather than one per serving to your taste.

Printable version of Recipe

1 serving

Ingredients:
1 egg
2 tortillas
1/3 cup salsa of your choice (I love Green Mountain HOT myself)
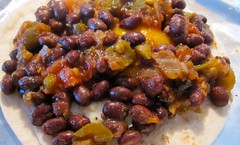
1/3 cup canned black beans (I prefer to make them myself, fresh, but in a pinch these are great!)
1/2 fresh avocado, mashed
*(see avocado tips at bottom of post)
1/8 cup shredded cheese (I used a Mexican blend containing
Monterey Jack, Cheddar, Asadero & Quesadilla cheeses.)
salt & fresh ground pepper to taste

I love my cast iron pan for this dish. It's well seasoned and the eggs don't stick with only a small amount or no oil sprayed on. You can substitute with your favorite frying pan if you haven't a cast iron pan.
A broiling pan with a sheet of foil on top large enough to hold the tortilla.

I began with making my favorite sunny side up egg. Cracking the egg into the cast iron pan, immediately cover it and let the egg begin to cook. I love a good runny yolk (you may not), and this allows the entire white portion of the egg to cook leaving the yolk nice and runny.

While the egg cooks, mash the avocado and spread it onto one of the tortillas.

When your egg is cooked to your desired doneness, add a little salt and pepper and slide the egg(s) onto the non-avocado covered tortilla that you have placed onto the foil covered broiling pan. I use the broiler in my toaster oven if I'm making only one. I use my regular oven if I'm making multiples at once so they are all ready at the same time or in batches.

While the pan is still hot, toss in the salsa and black beans to warm them up. If you are not using a cast iron pan, you may need to turn the heat back on to do this. I've found when I turn off the heat from cooking the egg in my cast iron pan, it's still hot enough to do this job without any more flame. Pour the salsa/bean mixture over the egg and top with the avocado covered tortilla.

Sprinkle the cheese on top of the mashed avocado and pop under the broiler. Heat until the cheese has melted. Keep an eye on things under the broiler as they can go from yummy and melty to burnt and destroyed in a flash.

With the help of a spatula if needed, slide your finished tortilla onto your plate. Sprinkle on additional salt and pepper to your taste. I added some heated leftover cooked asparagus and a mescaline salad before serving.

AVOCADO TIPS:
* When selecting avocados in the market, if you can easily remove the stem base (brown woody looking spot on the end of the avocado) with your fingernail, the avocado is ripe and ready to eat now. Keep your avocados out on the counter to ripen fastest rather than in the refrigerator.

* After slicing the avocado in half lengthwise (as shown in photo), firmly whack a sharp knife blade into the pit and gently twist. The pit will come out easily. Scoop the avocado out with a spoon and mash away. I use the now emptied avocado skin to hold the slippery pit and wiggle the knife back out of the pit. Be careful to not cut yourself. Slow and steady here.

Printable version of Recipe

Thursday, March 3, 2011

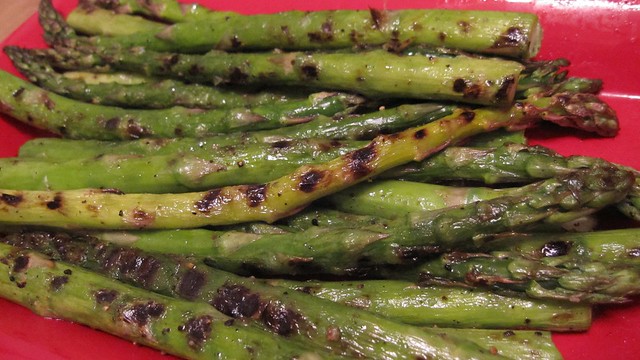
Asparagus is Easy


People are often scared to cook asparagus. Perhaps it's because over cooked asparagus is lousy.
Have no fear. It is one of the easiest vegetables to cook. I often make up more than I'll use at that meal and add it to salads later.

Printable version of Recipe
Ingredients:
asparagus
kosher salt
fresh ground pepper
olive oil

A grill pan, frying pan or grill

Prepare your asparagus using either the snapping or anti-snapping method discussed below.
in a bowl, place asparagus and a drizzle of olive oil. Less is more and you can always add more oil as needed. Rub the olive oil all over the spears. Sprinkle with salt and pepper.

Place spears in a single layer on your grill pan (that's what I used in the photo above), frying pan or onto your grill. Asparagus cooks in 2-3 minutes per side depending on how thick your spears are.

Serve.


ASPARAGUS TIPS:
*When selecting asparagus, thinner is better. Check the bottoms of your asparagus for dry ends. You want less dry end than more. It's best if your market has the bundles standing up in a little water. You should put them standing up in a little water in your own fridge at home. This will extend their life in your fridge.

* There are two schools of thought about how best to prepare the asparagus to be cooked. The anti-snapping side suggest you cut the woody end off your asparagus and then peel the tough outer skin off the lower portion of each spear. (See an example of this discussion at Food52 along with an wonderful recipe for Thai-Inspired Asparagus Salad with Fried Meyer Lemon.) I think this is the suggested method if you have quite fresh thick stemmed spears.

The snapping camp is also represented in my home. Taking the spear between your thumb and forefinger, snap the spear. It snaps where the woody part stops and the yummy part starts! This is especially helpful on skinny spears or on spears that my have been in your fridge longer than you'd like to admit. For a more in depth tutorial see the kitchen's post here.

*Grilling asparagus can be a little precarious. For thin spears, I use a grill pan (flat pan with smaller holes so I don't lose the asparagus into the grill.) For thicker spears, I thread them onto two skewers, one near the top of the spear, one near the bottom, until they look like an asparagus placemat. Then I can flip the entire set at once in the grill. I also have used the fish grilling basket that closes around the spears, holding them in place.

Printable version of Recipe

Tuesday, March 1, 2011

Potato-Bell Pepper Vegetable


This is a wonderful and simple Indian side dish from Maya. (Thanks Maya!)
It's REALLY REALLY easy and everyone seems to love it!
I've served it along side Indian dishes of course, but it's equally as tasty with a piece of fish and some rice. After you've tried it, let me know how YOU served it!

Printable version of Recipe

Ingredients:
olive oil
3-4 medium potatoes,
peeled/washed and cut into 1" thick slices of 1-1/2" lengths
3 Bell Peppers, cleaned and cut into 1" thick slices of 1-1/2" lengths
2 Tomatoes, cut into 8ths
1 tsp mustard seeds
1 tbsp garlic paste*
1/2 tsp ginger paste*
1-2 fresh thai chilies or 1 jalapeno, chopped (optional)
1 tsp cumin powder
1/2 tsp coriander powder
1/4 tsp turmeric powder
1 tsp red chili powder
1/4 tsp garam masala
salt to taste
1/2 cup finely chopped cilantro

Medium pan with cover (Ideally cover will have a lip at the edge that you can put a little water in without it running off.)

Peel and cut the potatoes into 1" thick slices of 1-1/2" lengths. I place them in a bowl covered with cool water. Just prior to putting them into the pan I drain them. The water that sticks to them is helpful in the cooking.

In a medium pan over medium high heat, add 2 tbsp oil. When heated, add mustard seeds. When they begin to pop, add the potatoes. Layer on the bell peppers, turmeric powder and salt to taste. Cover and cook on medium heat until potatoes are 3/4 done. (Stick potato with a fork and when still slightly tough, it's 3/4 done.)

Add ginger and garlic paste (and chillies/jalapeno if using) and stir to mix
well. Cover and cook for 2 minutes.

Add all other dry spice except for garam masala. Stir and mix well cook for 2 minutes. Turn heat down to a simmer once potatoes are cooked through.

Layer on the tomato slices. Cover and cook for 2 minutes. Add some water to the cover**.

Sprinkle on the garam masala and cilantro when done. Cover and let sit a few minutes.


** Tip: A trick Maya taught me. If you feel it may burn, put some water on top of the cover and keep cooking. This will keep the pot from burning.

*If you don't have these pastes, finely chop either garlic or ginger as called for. Garlic paste and ginger paste may be found at your local Indian market and at many specialty markets.

*** A note about Indian spices. You can play around with the spices in this dish. Beware that you may not want to increase the amount of turmeric as it can easily make a dish bitter.

Printable version of Recipe

Banana Cranberry Walnut Bread


I ran across this recipe over at Joy The Baker after finding I had more fresh cranberries remaining than I'd recalled.

I altered it a bit as follows.
It is so fragrant! The house full of workmen have enjoyed it as much as we have! Great with morning coffee or afternoon tea.

Printable version of Recipe

Makes 1 loaf

Ingredients:
4 very ripe bananas, smashed
1/3 cup melted salted butter
2/3 cup light brown sugar
1 egg, beaten
1 teaspoon vanilla
1 tablespoon Jack Daniel's
1 teaspoon baking soda
Pinch of salt
1 teaspoon cinnamon
1/2 teaspoon nutmeg - fresh ground is best
Pinch of ground cloves

1 cup toasted chopped walnuts (leave them chunky)
1 cup fresh cranberries

Preheat the oven to 350°F.

You can mix this recipe by hand, but I poured it all into my mixer. Mix melted and cooled butter into the mashed bananas. Add in the sugar, egg, vanilla and Jack Daniel's, then the spices. Take the moment to freshly grate/grind the spices. It will make your bread come alive!

Combine baking soda and salt and add to mixture. Add the flour, mix. Remove bowl from mixer if you're using one. By hand, add the toasted walnuts and cranberries, mixing until just incorporated.

Butter & flour a 8" x 4" inch loaf pan.

Tip: Try to not to put the butter/flour too far up the sides. Your loaf will rise better without the grease up on the sides. On the loaf pictures above I forgot and did the whole loaf pan. It didn't rise as much as I'd hoped. I often us PAM Baking, shielding the sides with a butter wrapper or card. I do put it into the corners and up the bottom 1/2" +/-.

Pour the mixture into the pan and drop the pan onto the counter once or twice to break any large bubbles.

Bake for 1 hour to 1 hour 10 minutes, checking after an hour with a toothpick or skewer. Cool on a wire rack.

Tips:

Toasting Nuts:

Break the nuts into a few pieces by hand or with a large knife. Put the nuts into a small frying pan over medium high heat and cook until toasted. Be sure to stir the nuts as you cook. BEWARE: Nuts will go from toasted to burned quite quickly.

Very Ripe Bananas:

I keep a reclosable freezer bag in the freezer with bananas that have gotten overly ripe. When the skins are nearly black, they get added to the bag. No waste!

Printable version of Recipe